How To Make Ubuntu Work Like Windows 10
12 Aug 2020
Last night, while walking the dog, I was listening to the latest episode of Late Night Linux where Joe speaks to his friend Kyle about his use of Linux and why he has ultimately decided to stick with Windows 10 for the time being.
I thought this was a very interesting discussion, which ultimately boiled down to Kyle saying on a number of occasions that he didn’t like the UI/UX of the distros he had tried, and that he wanted to make Ubuntu work more like Windows 10.
Kyle went on to say that he’s accustom to Windows and likes the workflow, but couldn’t find any simple guides on making Ubuntu work like Windows 10. That’s where this post comes in. 🙂
There was a couple of distros that he mentioned, including vanilla Ubuntu, Ubuntu MATE & Xubuntu. Kyle said that he couldn’t find any simple guides on emulating the Windows workflow in Ubuntu. So, I decided to write one.
Note: by the end of this process you will NOT have a Windows 10 clone - that isn't the point of this post. What you will have is an Ubuntu desktop that has a workflow similar to that of Windows 10.
The easy way
The easiest way to make Ubuntu work like Windows 10 is to download a distribution that’s already geared toward Windows migrants. Linux Mint and its Cinnamon desktop does a fairly good job of this, but I think the UX leaves a lot to be desired. Personally, I would compare Linux Mint Cinnamon to Windows XP rather than Windows 10.
I think that Zorin OS is a much better Linux distribution for Windows migrants, as it has a very similar workflow right out of the box.
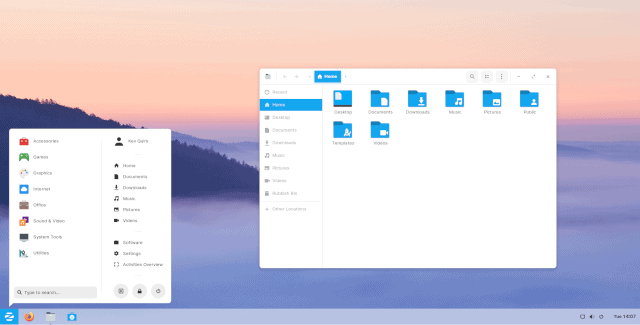 Zorin OS 15
The slightly harder way - make stock Ubuntu work like Windows 10
If you look at the default Ubuntu interface, you will see that there’s a taskbar at the top and another bar on the left. There’s no start menu, and if you press the Activities button, you don’t get a start-like menu, but instead a spread of all open windows.
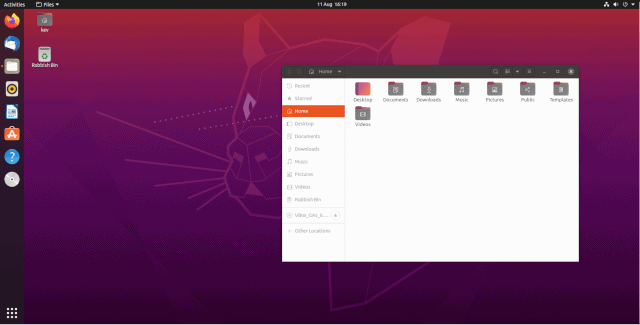 Default Ubuntu UI
It’s fair to say that the out-of-the-box experience of Ubuntu is very different to Windows 10.
What we’re going to change
In order to make Ubuntu work like Windows 10, there are few things we need to change. These are:
- Remove the top and side panels.
- Create a single taskbar at the bottom of the desktop.
- Integrate a system tray into the taskbar.
- Add a proper start menu to the taskbar.
To give you an idea of the kind of thing we’re aiming for, here’s my Windows 10 desktop:
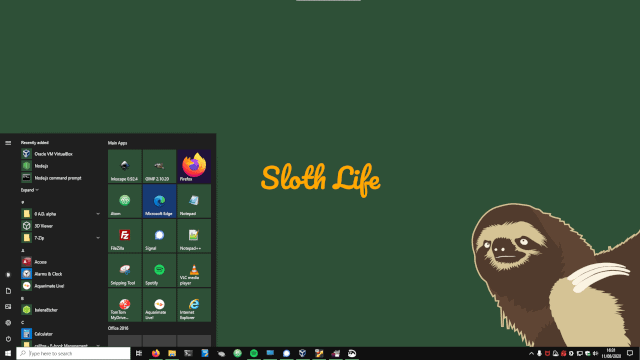
There’s a lot to go through here, but it’s all relatively simple and should take no more than 30 minutes. So, let’s get cracking, shall we?
Step 1 - installing extensions
First, you need to install the Gnome Shell Integration addon for Firefox. This will allow you to install Gnome extensions right from Firefox with the click of a button.
Next, visit the link for each of the extensions listed below and switch the black rocker from “OFF” to “ON” to install them. When you switch the rocker to “ON“, you will receive a prompt to install the extension:

Here’s the list of extensions you need to install:
- Dash to Panel - https://extensions.gnome.org/extension/1160/dash-to-panel/
- Arc Menu - https://extensions.gnome.org/extension/3628/arcmenu/
Step 2 - customisations
You should now have a bit of a hodgepodge of panels. There will be a single panel at the bottom, and a few icons that you probably don’t recognise. Don’t worry, we’re going to fix all that now.
Dash to Panel
The first thing to do is sort out the Dash to Panel extension. Right-click on the bottom panel and select Dash to Panel Settings from the pop-up.
On the Position tab, click on the Visible button next to Show Applications button. When you click this button, it should turn from grey to white. This will hide the applications button so we can replace it with the Arc menu later:
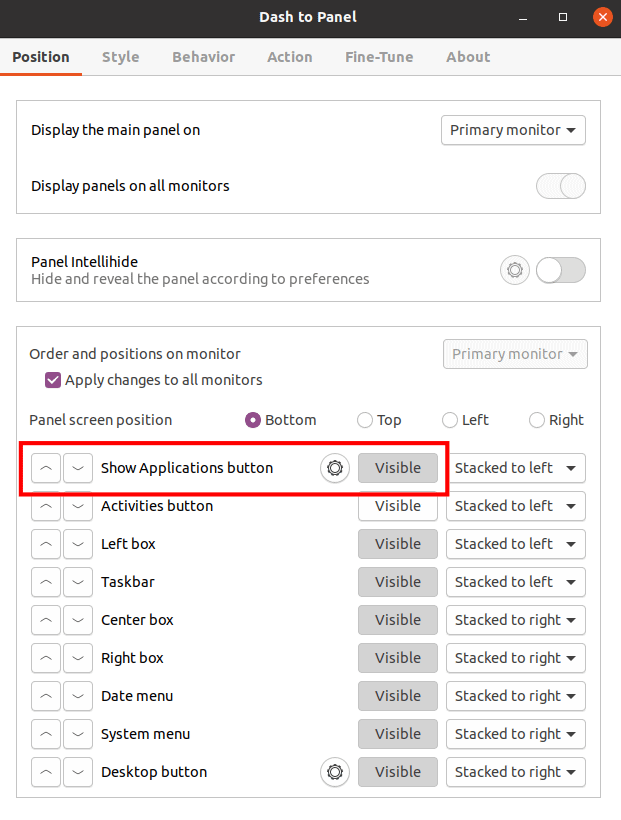
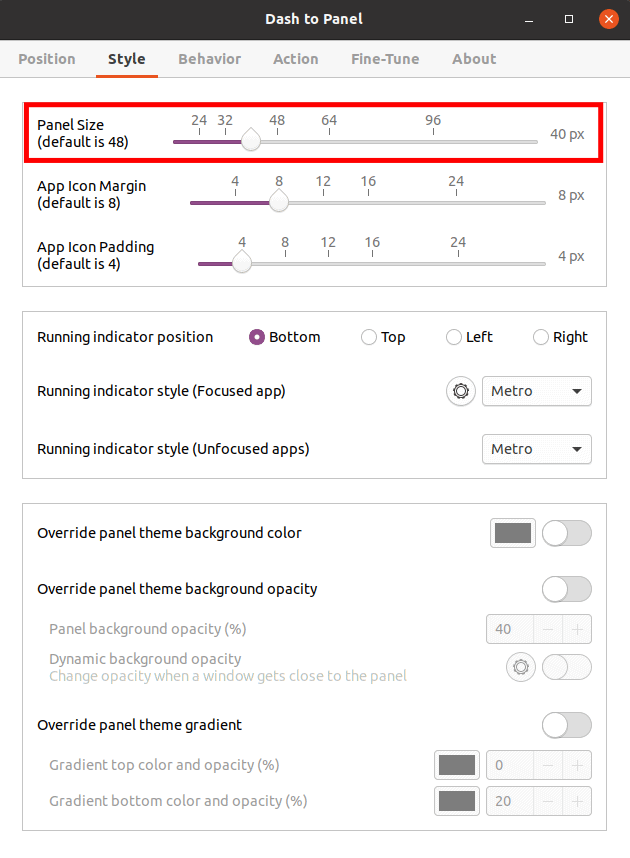
Click on the Style tab and change the Panel Size to 40px. This should make the panel a similar size to the Windows 10 taskbar. Obviously change this number to be larger or smaller as you see fit.
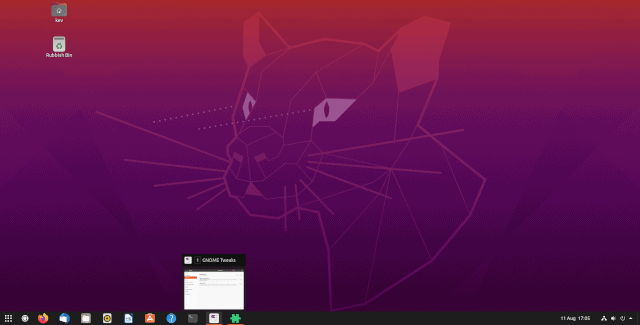
Next, go to the Behaviour tab and click on the cog icon next to Show window previews on hover.
Then, change the Window previews preferred size (px) from 240 to 120. Again, this should make the window preview similar to that of Windows 10 when you hover over an open application:
System tray menu
Next we need to configure the system tray menu. If you don’t know what the system tray menu is, these are the little icons that certain applications display on the taskbar, usually by the clock, when an application is running in the background.
These are usually application like anti-virus and file syncing tools. Here’s the system tray icons on my Windows 10 machine:
![]()
With Dash to Panel, the system tray icons should work out of the box. But if for whatever reason they’re not working, go back into the Dash to Panel settings and click the Visible button next to Right Box from the Position tab.
If everything works right, you should see the icons loaded on the panel, as shown below:
![]()
Arc menu
The last thing we need to do is make a couple of small tweaks to the Arc menu configuration so it works like Windows.
First, right-click on the Arc menu icon (it’s on the far left of the panel and looks like a grey “a”. Then, select Arc Menu Settings from the pop-up.
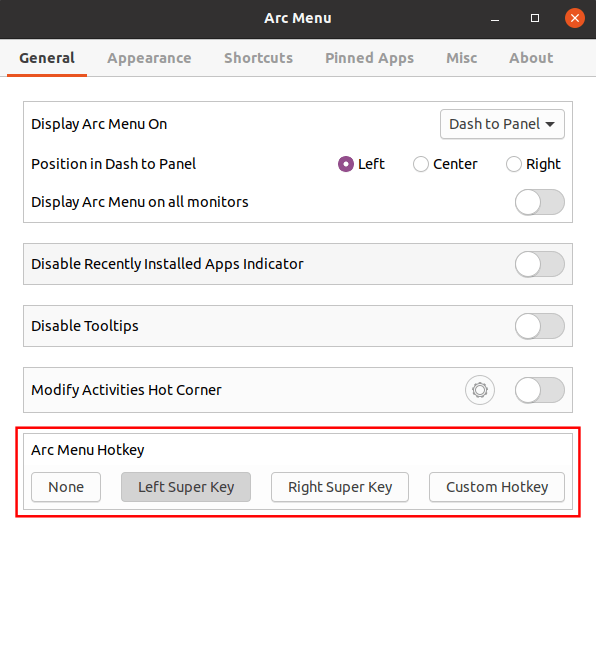
On the General tab, under Arc Menu Hotkey, select Left Super Key. This will ensure that when you hit the Windows key on your keyboard, the Arc menu will appear, just like in Windows 10.
Finally, we’re going to get rid of the silly “a” icon and replace it with an Ubuntu icon. To do this, go to the Appearance tab within the settings window and click on cog button next to Arc Menu Icon Settings.
On the sub-window that appears, click on the Browse Icons button, next to where it says Arc Menu Icon.
Another window will then appear. Select the Distro Icons tab, then the Ubuntu logo:
![]()
Close the third window, so you’re back on the icon settings window. Where it says Icon Size, change it to 30px. This should give you a nice Ubuntu themed icon that matches the rest of the panel:
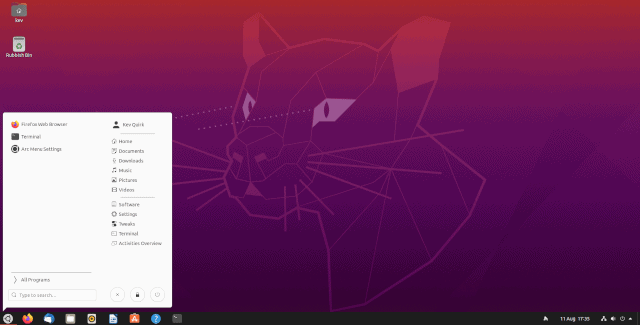
That’s it! You should now have an Ubuntu desktop that works like Windows 10.
Conclusion
As I said at the start of this post, my intention here wasn’t to emulate the theme of Windows 10 in this post, but rather the user experience and workflow.
At this point you should have the familiar single panel layout, with a good looking start menu and a system tray. However, it’s all themed in a way that still gives Ubuntu its own identity.
As you explore more, if you decide to change the theme of your Ubuntu desktop, the Dash to Panel and Arc menu should adapt too, so your theming remains consistent throughout.
I hope this post helps any new people coming over from Windows 10 to setup their environment in Ubuntu so it’s slightly more familiar than the default.