How To Self-Host Your Web Fonts
19 Jan 2020
If you’re using a pre-built theme, the likelihood is that Google Fonts is being used for rendering typography. This post will show you how to self-host web fonts so you’re not beholden to Google.
Getting Started
This first thing to do is to choose your fonts. If you want to use the same fonts as your site, you will need to the font names your theme uses. You can do that with browser plugins like Font Finder Revived for Firefox.
For this post we’re going to be using Font Squirrel as the font provider. If you don’t know which fonts you want to use, head over there and start browsing around.
Choosing Fonts
This site uses Fira Sans for headers and Merriweather for the body text. So we will use these as the example for this post.
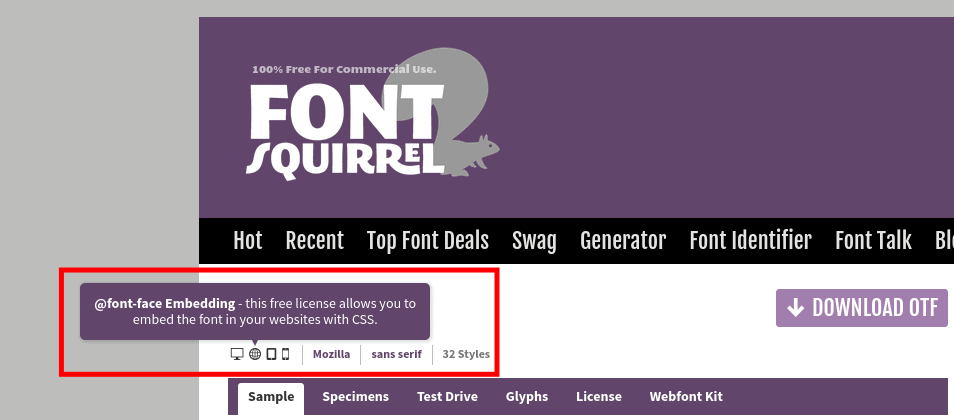
Before you go downloading fonts and using them on your website, you need to make sure the font’s license allows @font-face embedding. This is shown at the top of the font page and is depicted by a globe icon:

If the fonts you want to use have this icon, then you’re all good and can legally use them under the terms of the license. Both Fira Sans and Merriweather allow this, as do most of the fonts on Font Squirrel.
Now you know you can use the fonts you have picked, go ahead and download them using the purple Download button on Font Squirrel.
Removing Noise
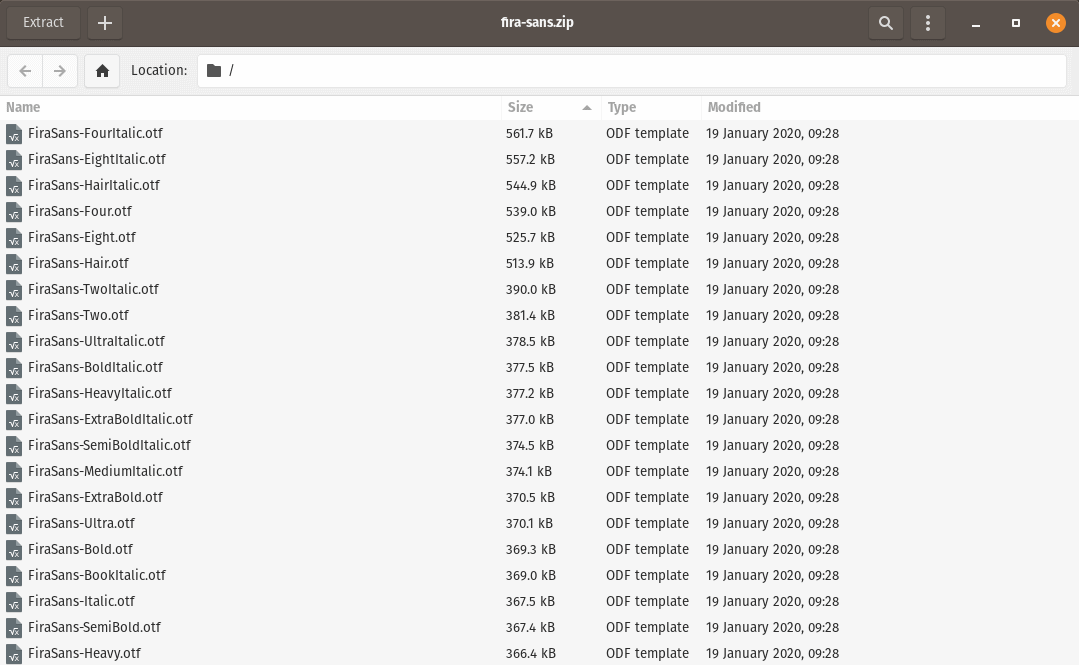
As you can see from the image below, Fira Sans has a tonne of fonts within the package. Since I only use Fira Sans for headers, I’m not going to need most of them.

My headers will only ever be bold, so I only really need the Fira Sans bold font. All the others are just wasted space. However, I may need an italic header from time to time, so I will take the bold-italic font too.
Merriweather doesn’t come with quite so many options, but there are still more than we need. Because we’re going to be using Merriweather for our body font, we’re going to need standard, italic, bold and bold-italic. I personally like the black version of Merriweather, because it’s heavier than normal bold, so it gives more of a contrast to standard text.
We have picked out the fonts we want to self-host, which are:
- Fira Sans bold and bold/italic (for headers)
- Merriweather standard, italic, black and black/italic
Self-Host Web Fonts
You should now have a folder for each font that contains only the fonts that you need for your website. It’s now time to convert these fonts into web fonts. This is done using Font Squirrel’s web font generator.
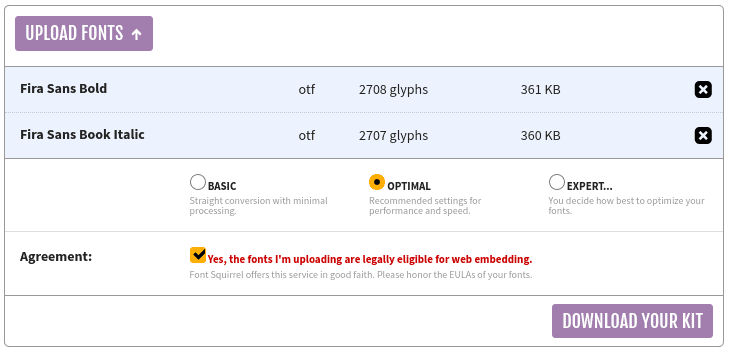
Keep the settings set to optimal and upload your first collection of fonts. You will also need to check the box to confirm the font license you’re using allows web font usage. Once the fonts are uploaded, click the Download your kit button.

Note: This process may take a few minutes to complete.
Repeat this process if you’re using more than one font. Once you’re done, you should have 2 web font kits that each look similar to this:

Extract each web font kit and delete all the files in the kit except for stylesheet.css and the WOFF / WOFF2 files. It’s now time to start implementing code changes so you can self-host web fonts.
Code Changes
Open up the stylesheet.css and change the font-family lines to all have the same name. In this example, they’re all called 'fira'. Then change the font-weight and font-style to suite what you need.
@font-face {
  font-family: 'fira';
  src: url('firasans-bold-webfont.woff2') format('woff2'),
        url('firasans-bold-webfont.woff') format('woff');
  font-weight: 700;
  font-style: normal;
}
@font-face {
  font-family: 'fira';
  src: url('firasans-bookitalic-webfont.woff2') format('woff2'),
       url('firasans-bookitalic-webfont.woff') format('woff');
  font-weight: 700;
  font-style: italic;
}
This will tell your website to use the standard bold font for text, but use the italic version of the font when rendering italic text. For Merriweather we have a few more entries, which are:
/* Standard font */
@font-face {
  font-family: 'merriweather';
  src: url('merriweather-light.woff2') format('woff2'),
       url('merriweather-light.woff') format('woff');
  font-weight: 300;
  font-style: normal;
}

/* Bold font */
@font-face {
  font-family: 'merriweather';
  src: url('merriweather-black.woff2') format('woff2'),
       url('merriweather-black.woff') format('woff');
  font-weight: 900;
  font-style: normal;
}

/* Italic font */
@font-face {
  font-family: 'merriweather';
  src: url('merriweather-light-italic.woff2') format('woff2'),
       url('merriweather-light-italic.woff') format('woff');
  font-weight: 300;
  font-style: italic;
}

/* Bold & Italic font */
@font-face {
  font-family: 'merriweather';
  src: url('merriweather-black-italic.woff2') format('woff2'),
       url('merriweather-black-italic.woff') format('woff');
  font-weight: 900;
  font-style: italic;
}
You now need set both to body and header fonts within the stylesheet for your website:
body {
  font-family: "merriweather";
}
h1, h2, h3, h4, h5, h6 {
  font-family: "fira";
}
The final step is to delete the Google Fonts link in the <header> of your website and replace it with links to your new stylesheets:
<-- Remove the line that looks like this -->
<link href="https://fonts.googleapis.com/css?family=Merriweather&display=swap" rel="stylesheet" />

<-- Replace it with this -->
<link rel='stylesheet'  href="fonts/merriweather/merriweather.css" type='text/css' media='all' />
<link rel='stylesheet'  href="fonts/fira/fira.css" type='text/css' media='all' />
That’s it! You can now self-host web fonts, but more importantly you’re not reliant on Google for rendering your typography.
Conclusion
Self-hosting your web fonts has a number of advantages. You don’t need to rely on 3rd parties for crucial parts of your website’s theme, and you have regained control.
Crucially though, because your website isn’t calling out to third parties, your website should load quicker too.